So, a little background here (no pun intended): I tried to replace one of my blog’s default background pictures with my own. That ultimately didn’t work, but I had already pushed my changes to GitHub by the time I found that out. After some lengthy research and some trial and error, I managed to revert these changes. In doing so, I learned how to use a handy GitHub feature! It allows you to view the state of your entire repository at a given point in time.
Replacing a background picture
I wanted to replace one of my blog’s default background pictures, in order to personalize my blog and make it stand out. I was successful, but I didn’t know how it would look until I pushed my changes to GitHub. Unfortunately, while the background picture looked OK, it made the text on top of it unreadable! Since I was on a bit of a time crunch, I decided to revert these changes and figure out how to personalize my blog at a later time. The question was, what was the best way to go about this?
An easy way to revert my changes
As it turned out, reverting already-pushed changes was harder than it looked. I tried out the git revert command, and I looked up some documentation, Stack Overflow, etc. That proved to be a major headache! (I’m not saying it’s impossible, just difficult.) But along the way, I discovered something great about GitHub: I can see the state all of my code at any given point in time! This proved to be a super handy way to undo my changes, without having to worry about git revert, git merge, etc.
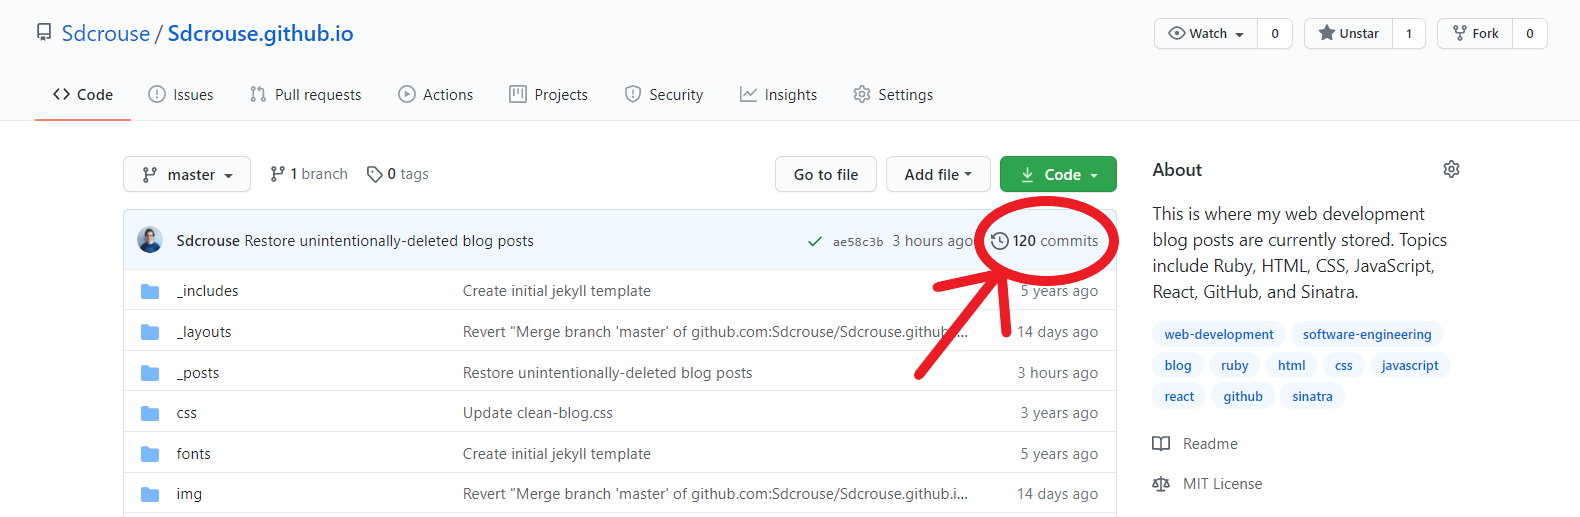
Here’s how to do it. First, go to the main page of your repository. At the top right of your repository, you will see the number of commits. It will be labeled something like “120 commits”. Click on that label to go to your commit history:
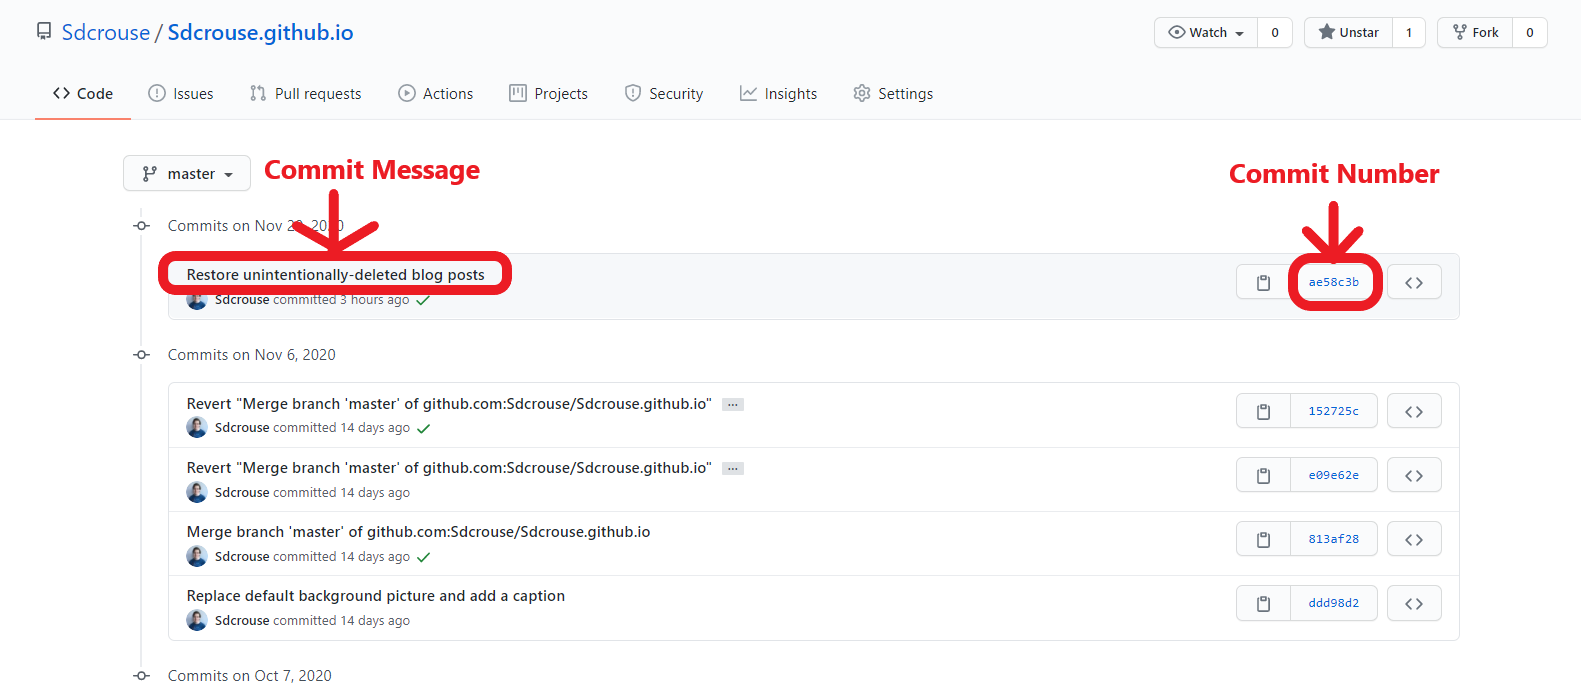
You should now see a list of all of your commits. From here, you’ll want to view your repository’s files at the commit that is right before the commit that introduced the wrong changes, not at the problematic commit itself. There are a couple of ways to do this.
The long way
First, click on either the commit message or the commit number (right between the clipboard symbol and the <> button):
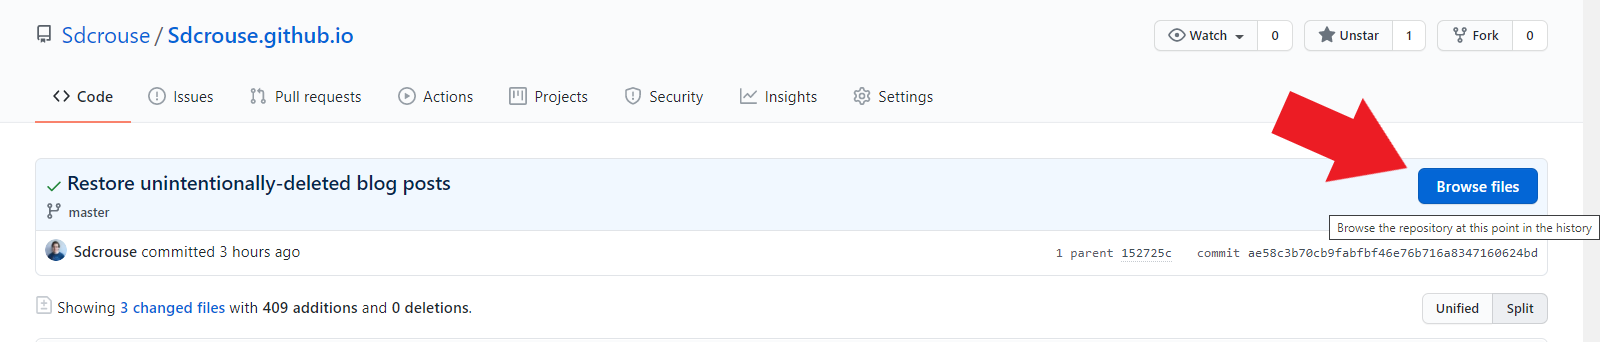
Again, make sure you’re at the commit that comes before the commit that introduced the breaking changes. When you’re at that commit, you’ll see a button in the top-right corner that says “Browse files”. As indicated by the button’s tooltip, that’s what will take you to the state of your repository at that point in history. In other words, you’ll be able to see what all of your files looked like before you made the breaking commit!
But guess what! There’s an even faster way to do this.
The faster way
Rather than clicking on the commit message or commit number, click on the <> button. That button has the same tooltip as the “Browse files” button, which means it lets you do the same thing: “Browse the repository at this point in the history”.

And BAM, you’re golden!
Whatever way you choose, you’ll want to view the breaking commit at some point, so that you’ll know which files were incorrectly changed, and how. If your changes simply involved editing/deleting text or code, then you won’t need to view your entire repository at all; you can just copy/paste the needed changes! However, if you deleted an entire file, directory, image, etc. (like I did), then you’ll want to follow the steps above. In my case, that made it easy to replace my new background image with the original.
A word of caution
Be really careful about reverting your changes! Make sure that you’re only making the changes that you need. I learned this the hard way: In the process of replacing my blog’s background picture with the original default picture, I accidentally deleted my last three blog posts (as you probably noticed from the images)! Thankfully, though, I was able to get them back by using that same GitHub feature that lets you browse your repository history from a specific commit. (I could have just gone to the commit where I deleted the blog posts, but I found it easier to copy the posts and their filenames by going to the files themselves at that point in history. Your mileage may vary.)
Conclusion
Considering the fact that I was originally just trying to replace my blog’s default background image with something else, this turned into quite a rabbit hole! However, it taught me some great lessons. Namely:
- GitHub has a great feature that lets you view any of your repositories at a given commit/point in history.
- Be careful when making changes of any sort, particularly when you’re trying to undo your changes from a previous commit. Make sure that you’re only making the necessary changes and nothing else.
I hope this proves as helpful for you as it has for me. Take care, readers!
Extra Resources
If you’re feeling brave enough, you can learn how to use the git revert command. Here are a few resources that can help, some of which also deal with reverting a merge commit:
- Git Revert tutorial
- Stack Overflow article on reverting a Git repository to a previous commit
- Stack Overflow article on rolling back a Git merge
- Stack Overflow article on reverting an already-pushed merge commit