Introduction: Have you ever worked on a lesson or a lab, only to realize that it didn’t look quite right - like maybe it had a couple of incorrect instructions, a sentence or two that could be phrased more clearly, or even a missing test? It happens. The people who write Learn’s curriculum are (just like the rest of us) imperfect; as such, there are going to be a few problems with the lessons here and there. But how do you fix them? You could Raise an Issue, but that might take a while to get fixed, depending on how urgent the issue is and/or how easy it is to solve. Thankfully, there’s another, arguably better option: opening a pull request on the lesson/lab itself! In this post, I’ll show you how to do just that (Hint: Just treat it like any other repository).
Open up the lesson’s GitHub repository
July 2020 update: Github has been updated since I wrote this blog post. The Github images that I used are for an earlier version. I will make notes of significant visual changes where appropriate.
Let’s use the Basic Nested Forms lab as our example. Suppose we wanted to add a Summary at the top:
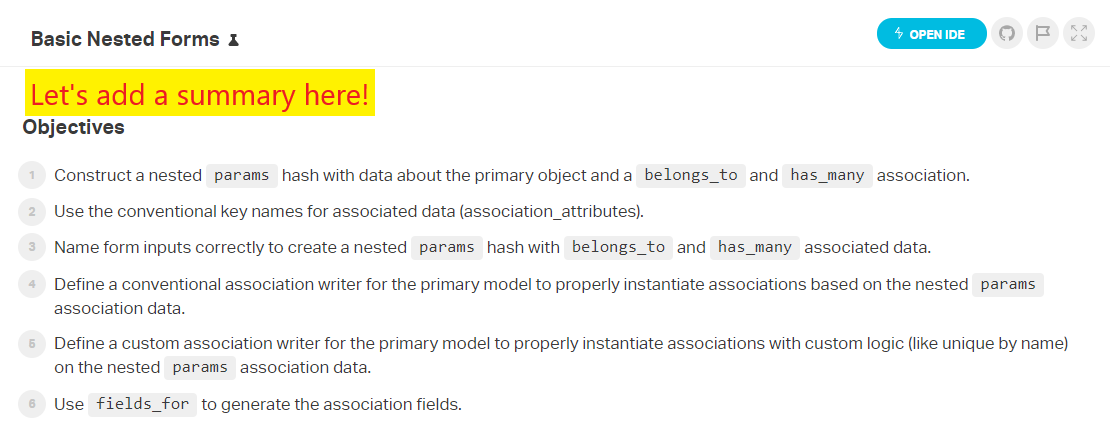
The first thing we need to do is get to the lab’s GitHub repository. You might be thinking, “OK. I’ll just click on the Open in Github icon at the top of the lab.” However, as I’ve been told, that usually takes you to the wrong repository. What you need to do is find the lesson at
https://github.com/learn-co-curriculum/[your-lesson-name]
I’ve found that the easiest way to do this is to click on the Raise an Issue icon at the top of the lesson:

This will take you to the correct repository:
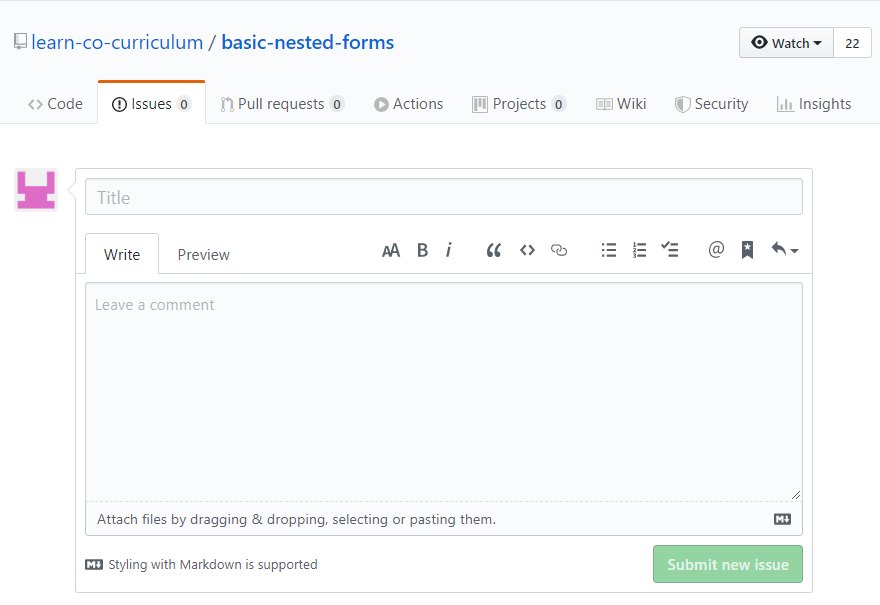
Side Note: This only applies to labs and codealongs, which have a blue Open IDE icon at the top. For regular lessons, which have a blue Sandbox icon, you can click on the Open in Github icon or the Raise an Issue icon; either one will take you to the correct repository.
Fork the lesson
Side Note: These next few steps are a review of forking, cloning, editing, committing your changes, and pushing to Github. If you want to skip all of that, go to the “Review your changes on GitHub” section.
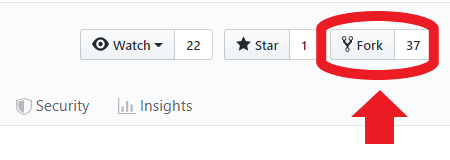
Click the Fork button in the top right corner:
You should then see a pop-up window:
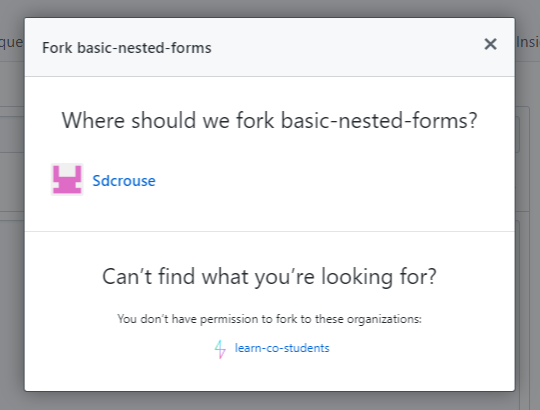
Just click on your profile icon and name, and wait a few seconds to be redirected to your newly forked repository. (If you’ve forked this repository before, the pop-up window will look a little different from the one above; just click on the link that it shows you, and you’ll be redirected to your fork). You should see something like this:
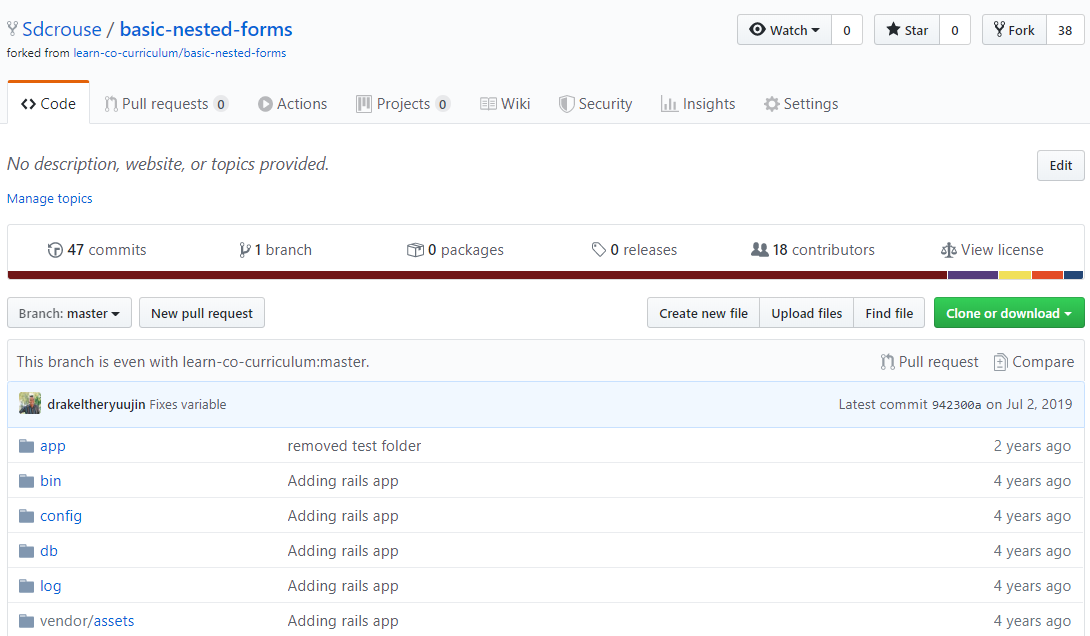
Clone the lesson into your IDE or local environment
Click the Clone or download button in the top-right corner, then click the clipboard icon in the pop-up window (I use SSH, but you can use HTTPS if you’d prefer):
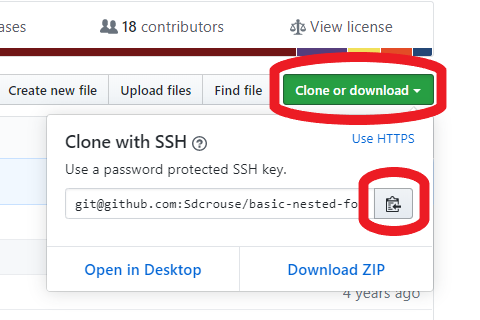
July 2020 update: The green button now has a “download” (down-arrow over a horizontal line) icon next to the word “Code”. It still works the same way as before.
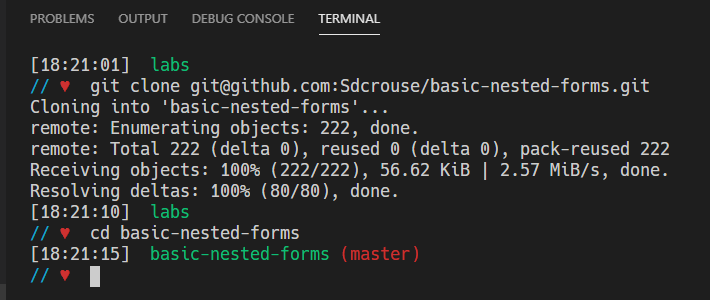
Now, go to your IDE or local environment, and write git clone [paste-your-repo-name-here]. The repo-name is what you copied from Github when you hit the clipboard icon. Now, cd into that new directory. I’m using VSCode in this case, but your command terminal should look something like this:
Make your changes to the lesson or lab
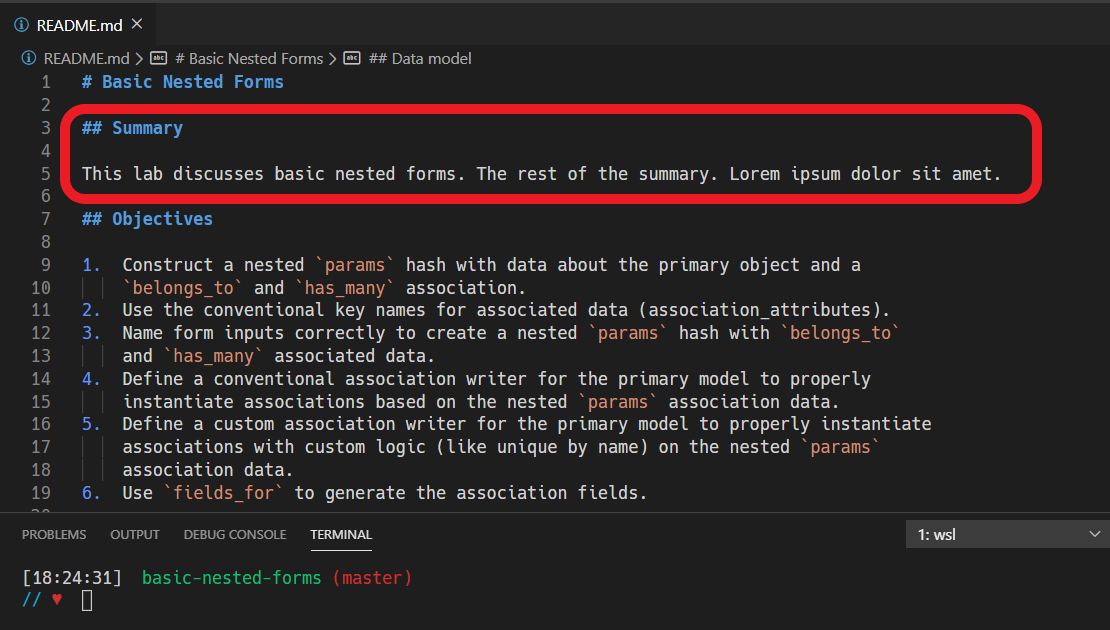
Let’s add a Summary to this lab’s README.md file:
Side note: If you make any changes to a lab’s test suite, be sure to try them out on your original lab first. Make sure the tests still work!
That all looks good, so we can move onto the next step.
Add, commit, and push your changes
Let’s stage our changes with git add . and commit them with git commit -m "Your commit message here":

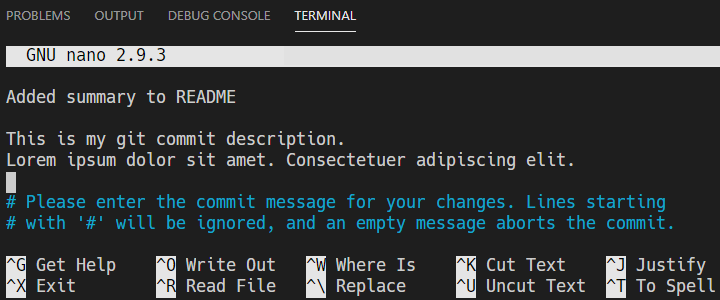
If you want to add a description to your commit that explains your changes in more detail, just write git commit. That will open up a text editor. You’ll be able to write and save something like this (I’m using “GNU nano”, but you can use whatever text editor you want):
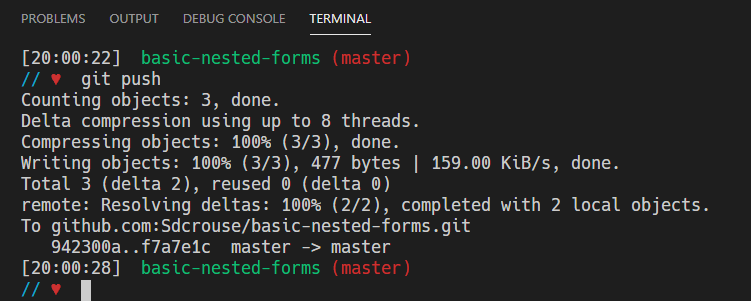
Finally, push your changes back to your repository with git push:
Review your changes on GitHub
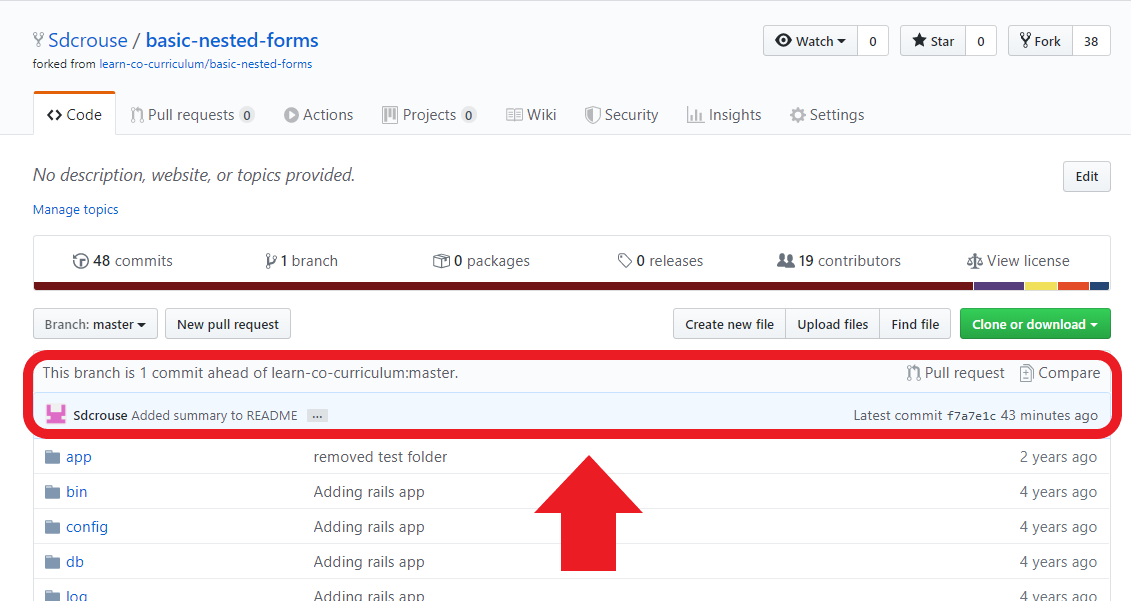
Go back to your GitHub repository and refresh it. If you pushed your changes successfully, your repository will show your last commit, and it will be at least one commit ahead of the original lab’s repository:
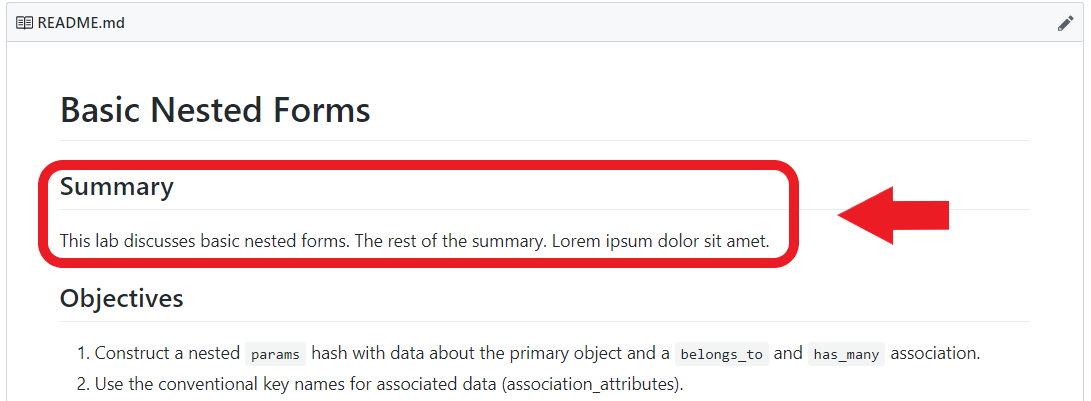
Since we changed the README.md file, we can see our changes by scrolling down:
That looks good, so let’s move onto the next step. If you want to change something else, just add, commit, and push your new changes before coming back here.
Open a Pull Request
We are finally ready to make a pull request! To do this, click on the New pull request button:
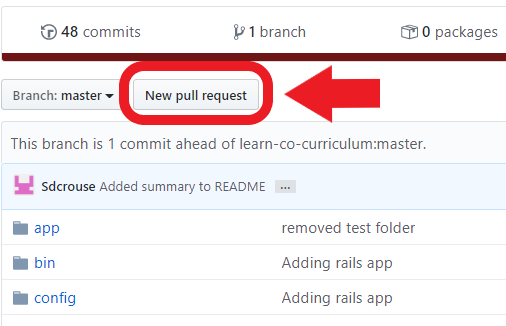
July 2020 update: There is no longer a New pull request button. Instead, click on the Pull request link (near the green Code button, next to Compare).
If your commits can be merged into the lab’s repository, you’ll be taken to the Comparing changes page with a green Create pull request button. It will look something like this:
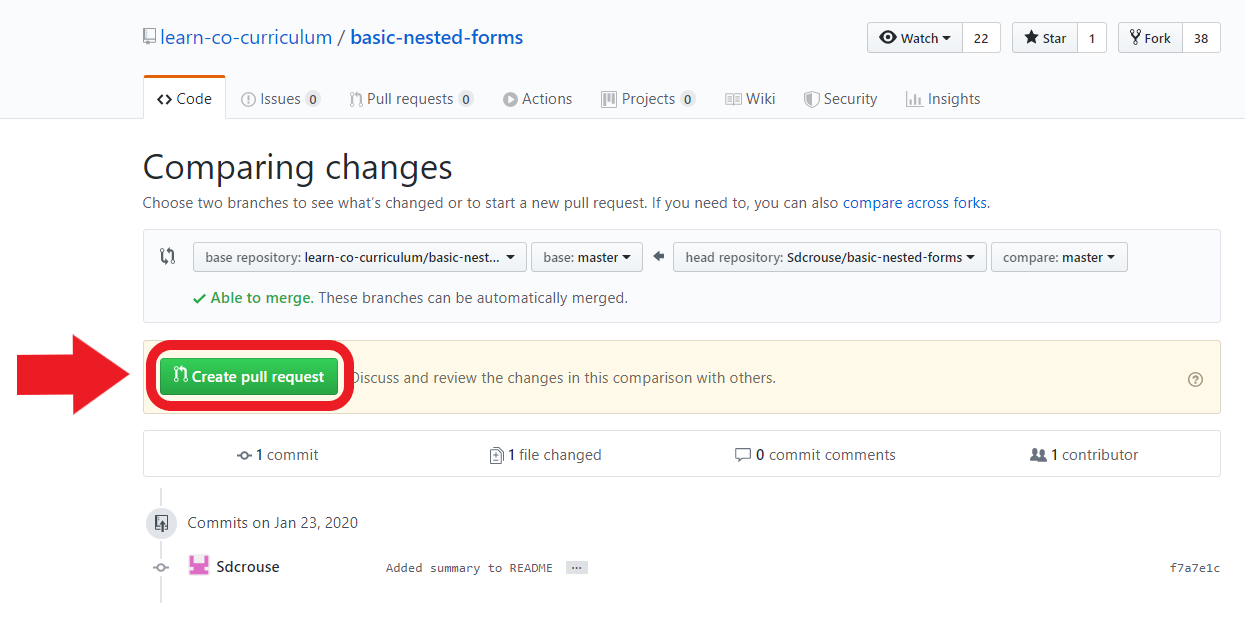
When you click on that button, you’ll be taken to the Open a pull request page. Here, you can review your commit and edit your commit message and description. Click the Create pull request button, and you’re done!
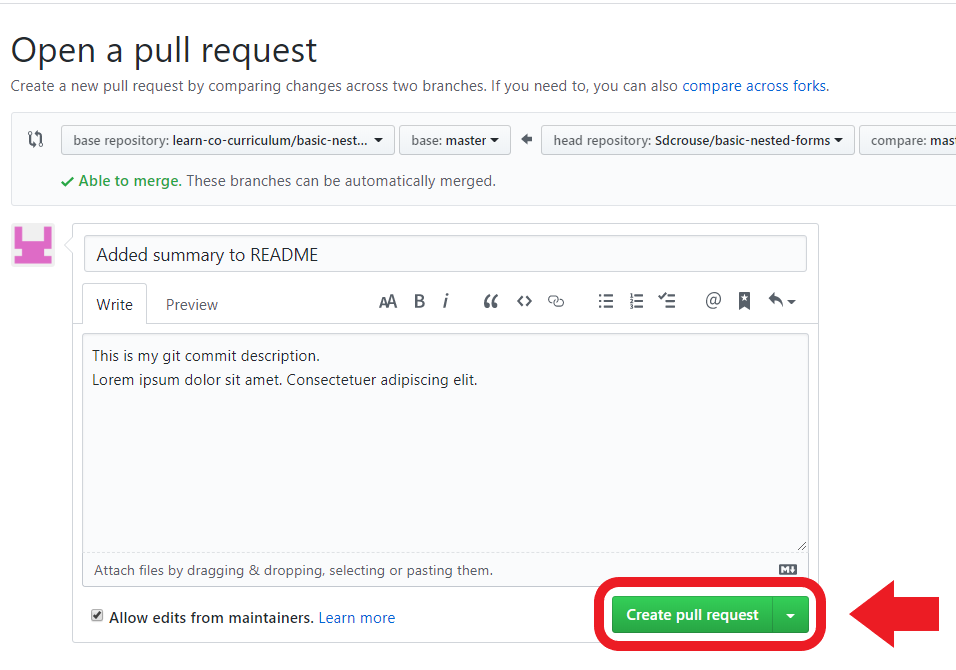
Side note: Since this is just an example, I won’t actually submit the pull request. The last thing I want to do is create a major headache for the Learn team!
If you’re being really awesome by solving a raised issue with this pull request, go ahead and edit your commit description in the Write tab. Write something like “Fixes issue…” and paste in the URL of the raised issue. After you hit Create pull request, this will create a link to the raised issue on the pull request’s page. (Note: I’m using a different example here, with an already-merged pull request for a closed issue.)
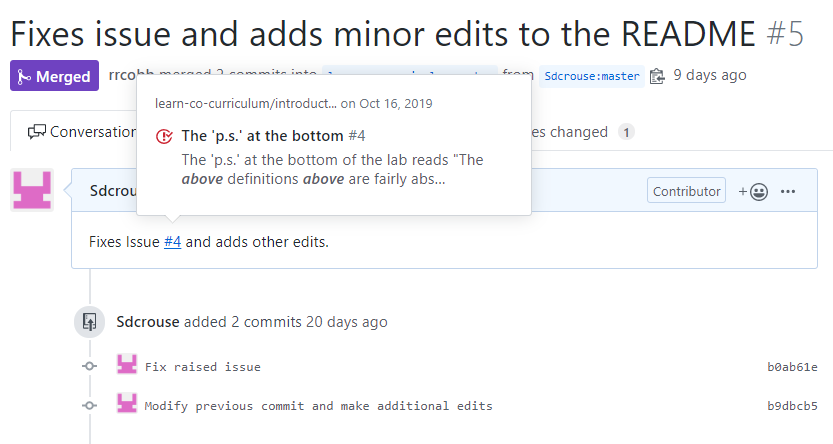
It will also create a link to the pull request on the raised issue’s page:
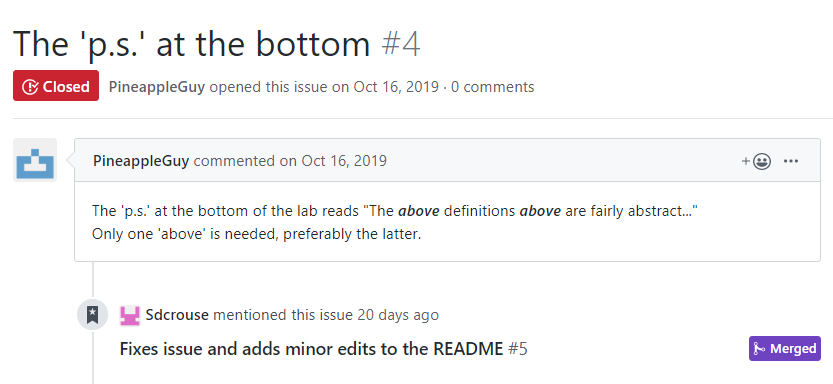
Cool! There’s just one more thing that we may need to do.
Make additional commits as needed
Suppose that you made a mistake with your pull request, or you’ve realized that you forgot to make an important change. What do you do, open another pull request? Thankfully, the answer is no. Just make a new commit, and push it to GitHub. That commit will be added to your pull request automatically.
That’s it! Now you can make changes to any lesson/lab that you want! (But please make good changes; be nice to the Learn team.)
Hold up! Why would you want to do all of this in the first place? Why not just Raise an Issue?
To be fair, if you don’t know how to solve the problem, it’s probably better to Raise an Issue. However, if you can solve the issue with a pull request, then I highly encourage it. Here are a few reasons why:
- It benefits the Learn team a great deal! It’s much easier (and quicker) for them to merge in an existing pull request, than to read over an issue, familiarize themselves with it, figure out how to solve it, make the needed changes, and merge them in.
- It benefits other students. The quicker that the lesson/lab is fixed, the less likely other students will have the same problem that you had. And for those students who have had the same problem, they’ll be able to look back at the lesson and see that it’s been fixed! This is especially true if your pull request fixes an issue that they raised.
- It benefits you. For one thing, you’ll get experience with fixing a real-world problem, and you’ll get to practice using Git and GitHub, both of which are skills that a lot of web development jobs (among others) are looking for. And - let’s face it - you’ll feel good doing it! “Virtue is its own reward”, after all, and you’ll get to say that you contributed to the Learn curriculum.
So, you’ll wind up helping out a lot of people just by submitting a pull request. Why not give it a shot?
More Information
Pull request basics
How to make a commit with a message and description
Feedback
I am always open to comments and suggestions for improvement on my blog posts! If you have any feedback for me, please feel free to raise an issue here. I will do my best to get back to you promptly.